

Submersible Pump & Motor
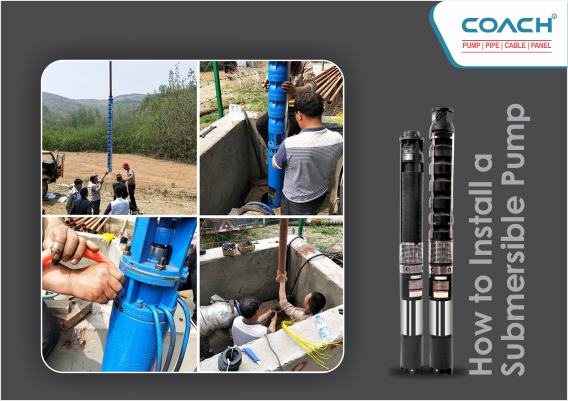
How to Install a Submersible Pump: A Step-by-Step Guide
- January 15, 2023
- Category :Submersible Pump & Motor
Introduction:
Installing a submersible pump can be a cost-effective and efficient solution for various water pumping needs, including well water supply, irrigation, and drainage. While the installation process may seem daunting at first, it can be relatively straightforward with proper planning and preparation. In this blog post, we will provide a step-by-step guide to help you install a submersible pump successfully.
Step 1:
Gather the Necessary Tools and Materials Before starting the installation process, gather all the required tools and materials. This may include a submersible pump, discharge pipe, control box (if applicable), electrical cables, connectors, wire strippers, wrenches, Teflon tape, and a rope or cable for lowering the pump into the well.
Step 2:
Prepare the Well Ensure that the well is clean and free from debris. If necessary, hire a professional to clean the well and inspect its condition. Measure the well depth accurately to determine the length of the pump’s drop pipe and electrical cables.
Step 3:
Assemble the Pump and Attach the Discharge Pipe Follow the manufacturer’s instructions to assemble the submersible pump and attach the discharge pipe securely. Use Teflon tape on threaded connections to ensure a watertight seal. Consider using a check valve on the discharge pipe to prevent water from flowing back into the well.
Step 4:
Connect the Electrical Cables and Control Box If your submersible pump requires a control box, connect it to the electrical cables following the manufacturer’s guidelines. Make sure the power supply is turned off before making any electrical connections. Use waterproof connectors and ensure proper insulation for safety.
Step 5:
Lower the Pump into the Well Attach a sturdy rope or cable to the pump and carefully lower it into the well. Ensure that the pump is submerged below the water level, allowing it to function properly. Avoid kinking or damaging the electrical cables during the lowering process.
Step 6:
Secure the Pump and Connect the Discharge Pipe Once the pump is in position, secure it using the manufacturer-provided brackets or straps. Connect the discharge pipe to the outlet of the pump, ensuring a secure and leak-free connection. Use Teflon tape or appropriate sealants as needed.
Step 7:
Test the Pump Turn on the power supply and test the submersible pump to ensure it is operating correctly. Monitor the pump’s performance, including water flow, pressure, and any unusual noises. If any issues arise, consult the manufacturer’s troubleshooting guide or seek professional assistance.
Step 8:
Secure and Protect the Wiring Properly secure and protect the electrical wiring to prevent damage or interference. Use conduit or protective tubing where necessary, and ensure that all connections are well-insulated and waterproof.
Conclusion:
Installing a submersible pump can provide a reliable and efficient water pumping solution for various applications. By following these step-by-step guidelines and consulting the manufacturer’s instructions, you can ensure a successful installation. If you are unsure or uncomfortable with any aspect of the installation process, it is recommended to seek assistance from a professional plumber or pump installer. With the submersible pump properly installed, you can enjoy a consistent water supply and efficient water management for your specific needs.
Installing a Submersible Pump seems to be a lot of work, but following these 8 steps will certainly make your job easy. Submersible pumps generally last long if installed properly. All you need to do is exercise patience and apply the steps mentioned above. Head to Coach Pumps to find more articles about Submersible pumps. For any type of technical support, Coach Support Assistant is always available for you.